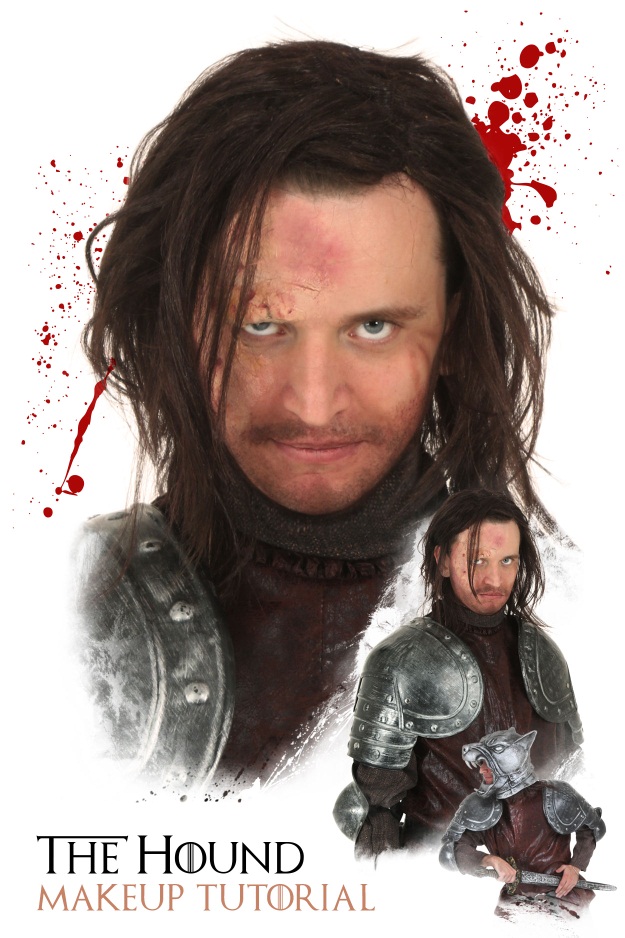
Sandor Clegane is one of the most interesting characters from the Game of Thrones universe. The more you’re exposed to The Hound’s story, the more you start sympathizing with him. He’s a tortured soul living in a world of lies, brutality, and hypocracy. He’s a brutal killer, but there’s more to this character than meets the eye and that is precisely why we love him. Well that, and he has a very memorable "look" that's makes him the perfect inspiration for a DIY Halloween tutorial!
*For anyone not completely caught up with the HBO series – potential spoilers below!*
Our introduction to The Hound was back in season one. He rode into Winterfell with the King’s retinue, a true warrior and bodyguard for the most evil little git in the history of Westeros. Back then he wore full armor and a helmet fashioned into a snarling dog’s head.
From these first moments with Sandor, and over the course of four seasons, he’s demonstrated his martial prowess, as well as his ability to make sense of the world in simplistic but brutally logical ways. He’s a man that loves to drink wine and kill, yes, but he’s also courageous, loyal, and embodies a true knight more than most in Westeros. He’s the only Kingsguard that never hits Sansa and eventually he abandons the cruel and psychotic Joffrey at the Battle of the Blackwater.
In the season four finale, The Hound and Brienne beat the living crap out of each other and it made for great television. We’re just hoping The Hound isn’t really dead. Of course if he is, you could easily add some green and gore and turn this tutorial into a zombie Hound DIY!
The Makeup
First things first, getting the face right. Sandor has an enormous burn covering the right side of his face (in the books it’s covering his left side, so choose which version you want to go with).
Supplies Needed:
- Special Effects Complete Makeup Kit - Shop
- Tissue paper
- Pen cap, tweezers, or a seam ripper (something somewhat sharp and small)
- Scotch tape
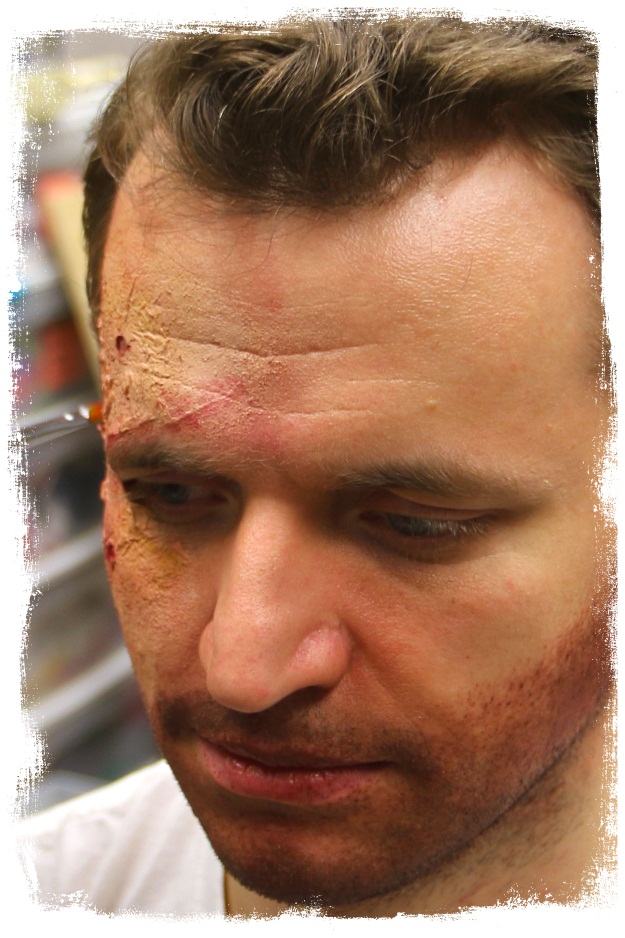
 STEP ONE: Start by outlining the area of your face you want to work with using a red blush and a large makeup brush. It’ll make the skin look puckered, irritated, and taut.
STEP TWO: Start applying the liquid latex in the outlined area. You may want to avoid your eyebrow because liquid latex can be uncomfortable to remove if it's attached to hair. We used spirit gum to cover the eyebrow area.
- The Hound’s burn is literally all along the side of his head, preventing hair from growing, but we didn’t want to shave the model's head so we "burned" a good portion of the forehead, brow, temple, and cheek.
- You’ll want to tape the corner of your eyebrow down to get the droopy effect seen in the show.
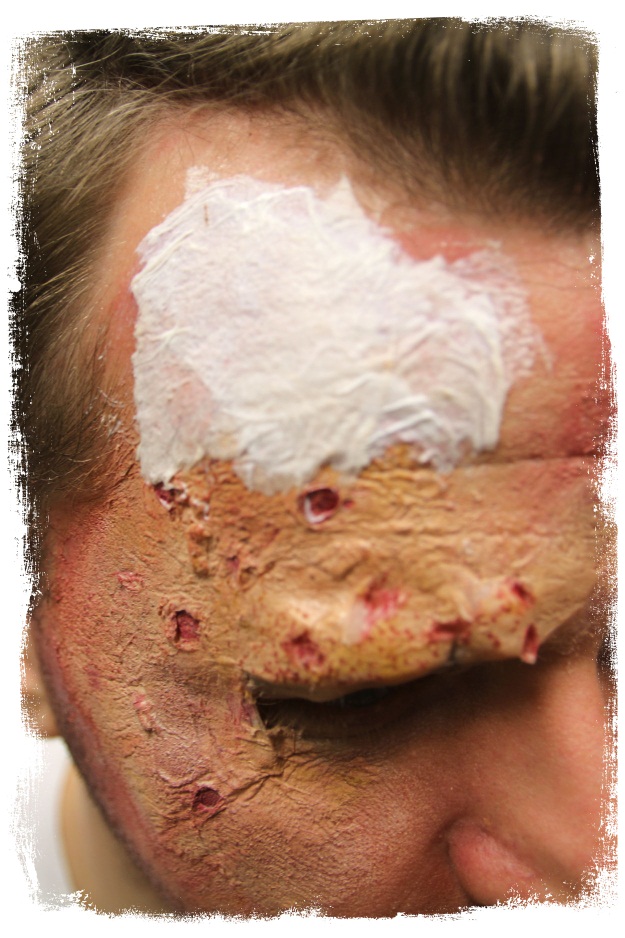
STEP THREE: After applying the liquid latex, immediately place a piece of tissue on the still wet liquid latex. Once the latex dries a bit, you’ll notice the tissue binds well to the latex and any excess tissue can be ripped away.
STEP FOUR: Reapply liquid latex over the top of the tissue you just placed. This will give the area a texture similar to flesh. Let the latex dry and use the color mask powder to create a skin tone closely matching your own. Be sure to cover the edges of the liquid latex area so it blends well into your natural skin. Do not completely cover the red makeup you outlined earlier.
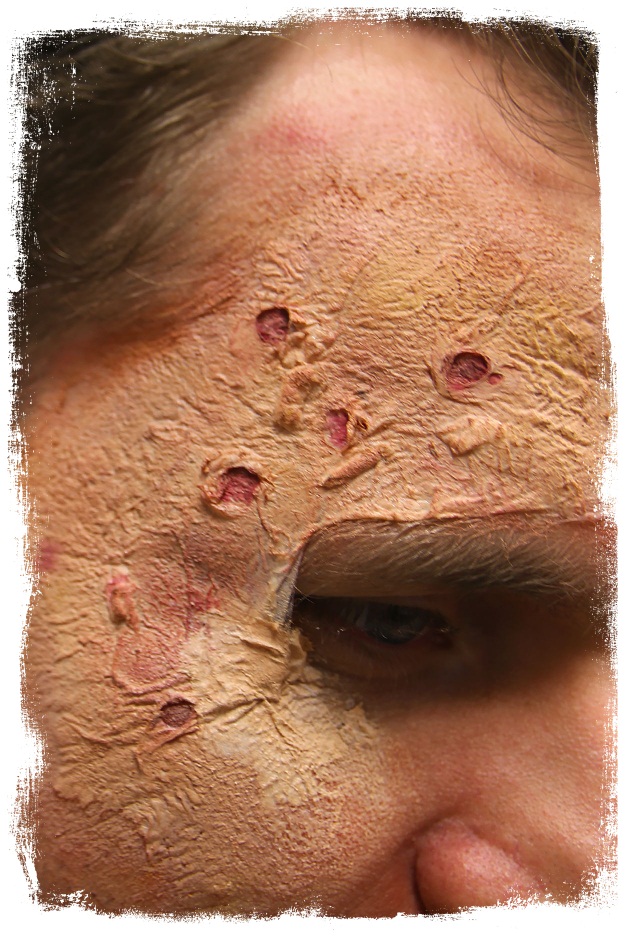
STEP FIVE: Time to get the blistered look. To do this, poke a hole in the now dried liquid latex and pull the material up and out a bit. A pen cap works well to poke with; it’s not sharp enough to stab you and it creates the perfect sized hole. This will create a recess in which to apply the red makeup or even use some stage blood or coagulated blood. In the newly formed recess, lightly brush the red in. Be sure to cover the protruding flaps of latex on the side that would be touching your skin.
- Make as many of the opened blisters as you see fit. The HBO Hound doesn’t have a lot (it’s more puckered scar tissue), but the description of Sandor in the books makes him sound like Two Face from The Dark Knight.
STEP SIX: You don’t have to grow a beard, but we recommend at least applying makeup to look scruffier. You can also apply brown makeup around the eyes and mouth to give yourself pronounced wrinkles and a gritty look.
The Hair
Supplies Needed:
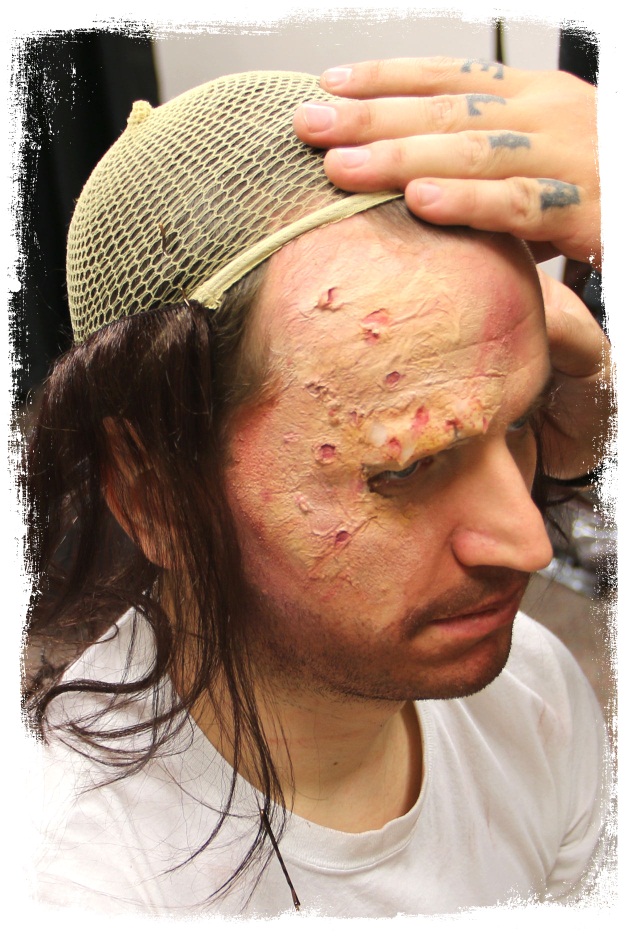
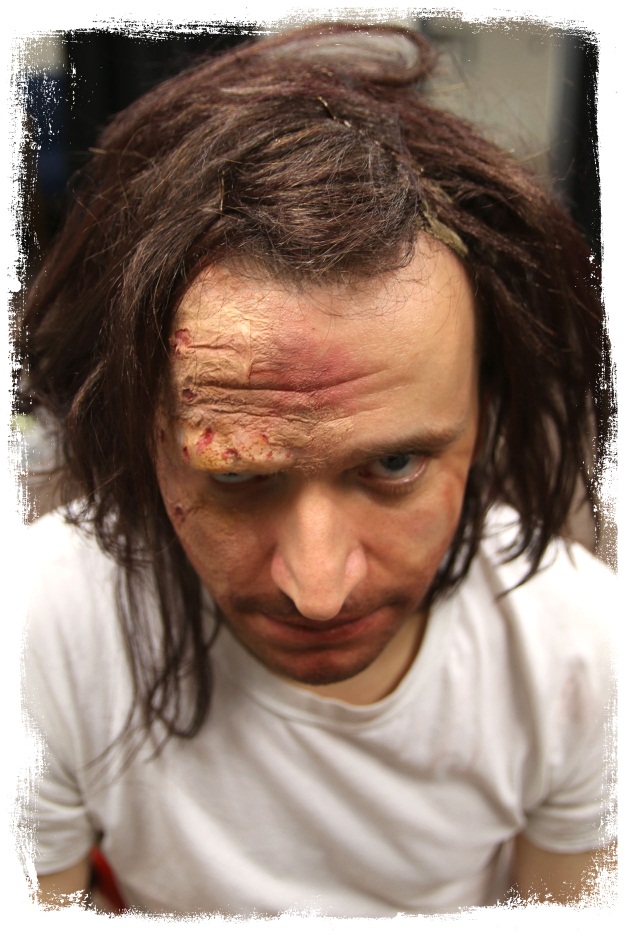
The hair can be tricky. The Hound doesn’t grow hair on half his head, so you really need to be careful that you don’t have too much hair. We went with our Brown Viking Wig and proceeded to dismantle it. We pulled out the individual tracks of hair and bobby pinned them to the model's head with the help of a wig net, which gave us the maximum amount of control. The Hound has a huge comb-over, so go light on the side you’re placing the scar on. Place more hair on top and comb it over to the burned side like he does in the show.
The Costume
Supplies Needed:
- Northern King Costume -- Shop
- Medieval Knight Costume -- Shop
- Adult Brown Pants
- Tall Black Costume Boots
- Sword Accessory -- Shop
- Game of Thrones Hound Helmet -- Shop
The rest of The Hound’s look comes down to his armor. In the show he wears a mishmash of studded leather, a gorget, chainmail, and plate mail. In lieu of studded leather, we went with a leather jerkin from our Northern King costume that you can find here. We cut off the lower portion of the costume to shorten it, and put a simple belt on. We used the shoulder and elbow plate armor from a medieval knight costume and fastened them to the leather jerkin with pins.
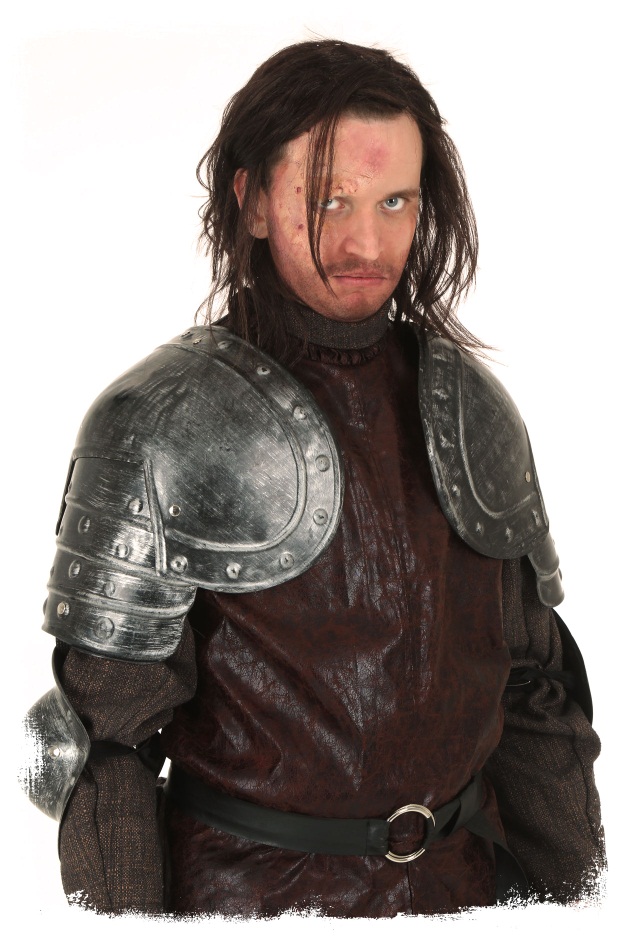
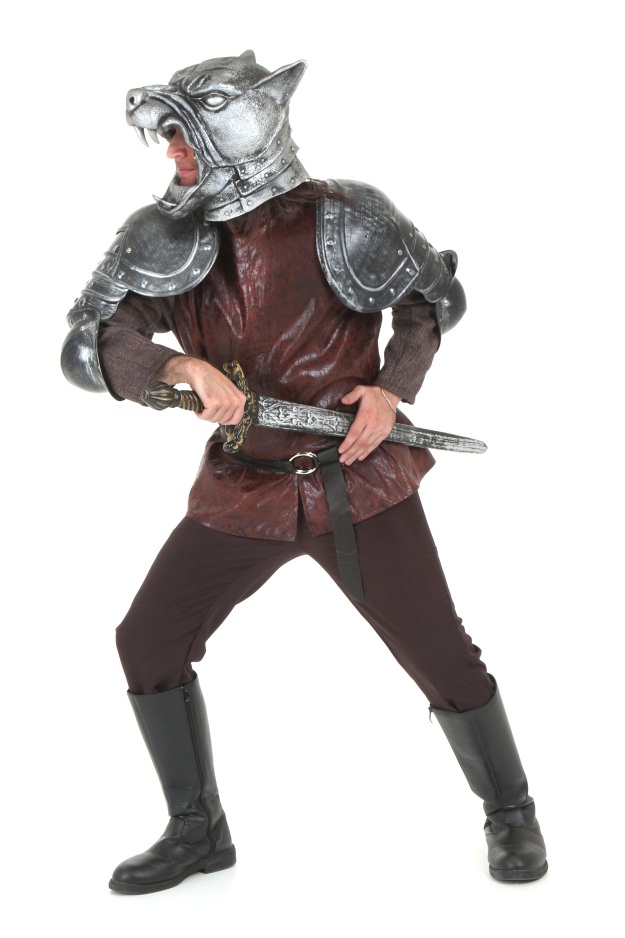
The Hound wields a sword with deadly efficiency, so we accessorized accordingly. Nothing too fancy, though. (The Hound has always wanted some Valyrian steel but he never gets the opportunity to own his own.) And don't forget the helm!
The Finished Product
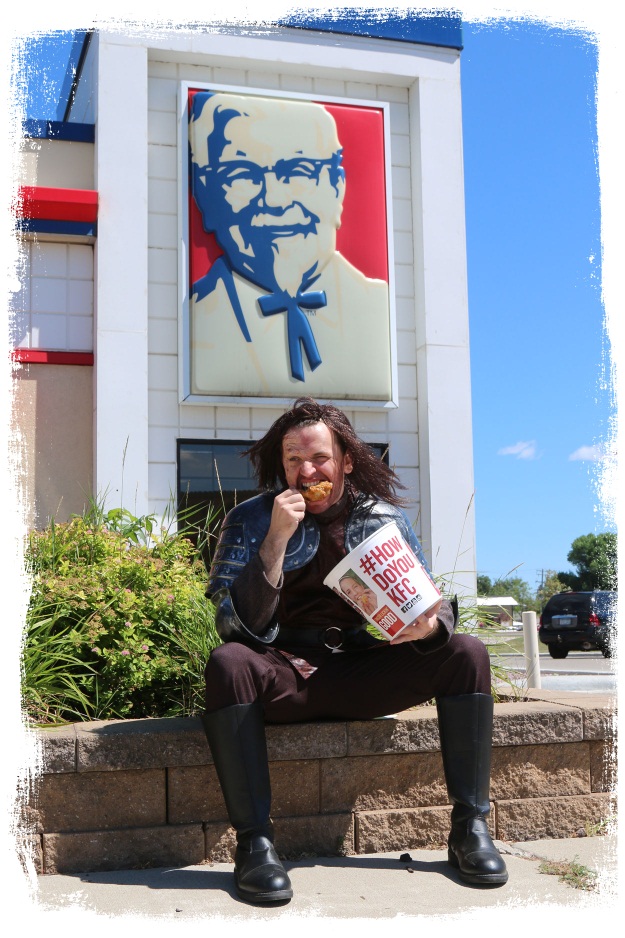
You can end the look there, or, if you really want to get meta, grab yourself a bucket of chicken. Any chance you get to call someone a talker, you can tell them talking makes you thirsty and hungry, and if any more words come pouring out their mouth, you’ll have to eat every chicken in the room.
If you want a different look within the realm of Game of Thrones, take a look at our White Walker DIY. If you have a group of people, you should also consider following our Red Wedding DIY tutorial.

